Probably everyone who is interested in the digitalization of the world and crypto-currencies, and wants to protect them, is familiar with the various methods of safely storing their crypto-currencies. There are many different options, but storing them in a physical wallet is undoubtedly among the safer ones.
What are crypto wallets?
Crypto wallets are physical wallets where you can store your crypto-currencies. Before deciding which wallet is right for you, however, you need to understand how wallets work. Although the amount of information about crypto-currencies may seem overwhelming and can sometimes give you quite a headache, we want to show you that entering the world of crypto-currencies is not that difficult if you start with the right wallet.
When thinking about the most suitable crypto wallet, you need to consider that the most important factors in deciding what to choose are security, ownership, and ease of use. Why? Because your wallets can be easy prey for hackers who want to steal your crypto assets. When using a physical wallet based on crypto-currency exchange, the provider owns the private keys to your wallet and is therefore the owner of your funds. In addition, exchange wallets are highly susceptible to hacking.
Brief overview
The Ledger Nano S is the safest way to store your crypto-currencies, thanks to the company’s security protocols. Beginners or occasional investors will have peace of mind knowing that their funds are safe offline, yet they can easily access their crypto-currencies or view their accounts when using the physical device. It can support 26 crypto coins and more than 1,500 crypto tokens. It is among the most affordable crypto wallets.

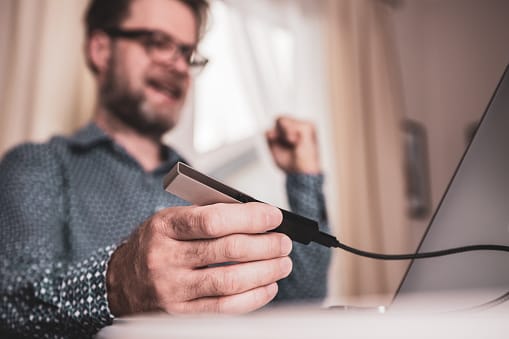
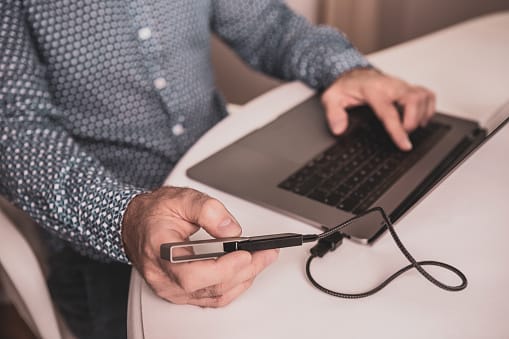
How do we use the Ledger Nano S?
To set up your Ledger Nano S, plug the device into the USB port of your computer. You can use the cable in the box or any micro USB adapter cable. For security reasons, it is always a good idea to use a cable you can trust. The next step is to visit Ledger.com and download the software. Click the ”Download” button and then proceed to select the version of Ledger Live for your operating system. The Ledger Live software is available on Windows, Mac, and Linux.
After downloading the Ledger Live application, proceed with the installation. This will be a quick process, but the software will not work unless you also configure your Ledger Nano S. Once connected, the messages ”Welcome” and ”Press both buttons to begin” will appear. Go ahead and press the buttons.
As you go through this instruction phase, you will see a new message on the screen: ”Configure as new device?”. If you are setting it up for the first time, press the right button; if you want to go to the ”Restore configuration” menu of your Ledger Nano S, press the left button. In our case, assuming this is our first setup process, we will configure it as a new device.
Create a PIN code for your Ledger Nano S
After confirming, you will receive a request to set up a PIN code. Press both buttons simultaneously to confirm and continue. On the Ledger Nano S, PIN codes are 8 digits long. To complete this setup step, you will need to use 8 digits from 0 to 9. You could use, for example, 01234567. Nevertheless, it is advisable to avoid any code that is simple and easy to guess. At the same time, make sure you choose a code you can remember and write it down.
Confirm your PIN code
Once you have selected your PIN code, your Ledger screen will prompt you to confirm the PIN. You will need to enter the full code again using exactly the same methods. This step ensures that you do not set an incorrect PIN code that you will not remember later.
Write down your recovery phrase
Just as the PIN code is the key to your device, the recovery phrase is consequently the key to your crypto coins. You must pay close attention to this step, as without it you will have no way of accessing your coins. In particular, make sure you enter every word exactly as it appears on the screen.
In addition, keep your recovery phrase safe and protect it to the best of your ability. Should anyone find the words, they can back up your wallet on another device and take possession of your crypto coins. Therefore, the security of these 24 words is essential to your financial sovereignty. The words that make up your recovery phrase are part of the BIP 38 dictionary. A unique permutation of 24 out of 4,096 words will be generated for you, which you will need to write down one by one. You can create as many wallets as you like, but your Ledger Nano S can only access one at a time.
Confirm your recovery phrase
After you write down your recovery phase, you need to confirm it. In this section, you need to confirm the order of your 24 words. Ledger Nano S shuffles their order and you need to use the navigation buttons to find them. When you find the first word, press both buttons simultaneously to confirm it. This is the most tedious step of this setup, but also an essential one. If you made mistakes when you wrote down the recovery phrase, you will find them now.
In the event that you find mistakes, you can try again. However, if you cannot figure it out, it is better to go back to the previous menu. Another way is to disconnect your Ledger Nano S and reconnect it. This hard reset will allow you to restart the setup process and the second time around you may pay more attention to it. If you correctly select each word, you will receive the message ”Your device is now ready”.
Open Ledger Live
The message on your Ledger Nano S screen should read ”Install apps on your Ledger device using the instructions at start.ledgerwallet.com”. You now need to open Ledger Live on your computer.
First, a screen will appear where you will need to choose the color of your theme. This decision only affects your user experience, so you can choose your favorite. To mix between light and dark, select ”Dusk”. If you prefer bright and well-lit menus, select the ”Light” mode. Once you decide on your preferred theme color, click the ”Get started” button.
On your computer screen you will see the initialization menu. You can initialize the device as new, restore a recovery phrase, or use an already initialized device. In our case, we have already initialized the Ledger Nano S, so we select the third option. Ledger Live also allows you to set up a hardware wallet from their desktop interface, but it is better to do this on your Ledger Nano S. Not only is this a more secure setup, but you also get used to controlling your Ledger. All transactions require device confirmation, so you need to learn how to press the buttons.
Initially, the Ledger Live interface will prompt you to select your hardware wallet model. Since you own a Ledger Nano S, confirm it and proceed to the next menu. The second step of this process is a security checklist. Here you need to confirm that you chose the PIN code yourself and that you have saved the recovery phrase. Ledger’s method ensures that you have followed all the steps and that you have your data backed up.
To avoid hacking attacks, Ledger Live also checks whether your device’s software is genuine. You don’t need to do anything for this, other than allowing the software to perform the verification. It is important for Ledger to verify that you are not using a compromised device. And if you purchased the device from an authorized retailer, you don’t need to worry about this, as it is most likely genuine.
Now it is time to set up your Ledger Live password. This has nothing to do with your PIN code on the device, but is simply a way to lock the desktop software. If you don’t want anyone using your computer to be able to access your Ledger data, set a strong password. Once you set the password, you will be able to choose your privacy settings. In the ”Bugs & Analytics” menu, you need to select what types of information you share with Ledger. When you click ”Continue”, you will finally see the Ledger Live interface. From here on, everything comes down to deciding which coins you want to use.
Adding crypto coins
In the menu you will finally be able to add cryptocurrencies to your wallet. Ledger Nano S offers 120 kB of storage capacity, so you need to decide which coins you will use. For setting up Bitcoin alone, you have more than enough memory. However, a multi-coin setup allows you only Bitcoin, Ethereum, Ripple, Litecoin, Ethereum Classic, DASH, and Monero.
Ledger Nano S supports hundreds of coins, but a single device can only store a handful of them. Therefore, it is good to manage your storage space wisely and set priorities. If you want to install new crypto coins, go to the menu, type the first few letters of the selected coin, and install it. On your Ledger Nano S you will be prompted to confirm the installation. However, if the device has been idle for several minutes, you will need to enter your PIN code again.
Sending and receiving cryptocurrencies
After you have set up your Ledger, you are ready to go. You can now send and receive cryptocurrencies that you have stored on your Ledger.
The advantage of the Ledger Nano S wallet is security. Therefore, whenever you deal with addresses, you must verify them on the device. It is very important that the information on both screens matches. This prevents phishing attacks or human errors where you send to the wrong address.
Whenever you receive any crypto coins, the Ledger Nano S will require you to verify their validity. Addresses will be generated in the hardware wallet and sent to Ledger Live. This means that in a normal situation, when everything is fine, the information is identical. When sending coins, you need to review much more than just the recipient’s address. Ledger also allows you to verify transaction fees. This is essential, as due to notable errors, some users have overpaid and lost funds. Your Ledger Nano S will allow you to double-check.
When you press the physical buttons to confirm, you instruct the secure element to sign. This complex security process is unique to Ledger. The company introduced secure element chips to the hardware wallet market. This was a revolution for physical security, and to this day none of the major manufacturers use the same chip.
In the event that you want to give your Ledger to someone or you have simply bought a new one, a mandatory step is to reset it beforehand. You can reset it in two ways:
- PIN code; – The Ledger Nano S has a built-in security feature that resets the device if you enter the wrong PIN code three times in a row. If you want to reset your Ledger Nano S using this method, simply turn on the device by connecting it to your computer via USB cable. The device will ask you for your PIN code to unlock it. However, since the goal is to reset the device, you need to enter the wrong PIN code three times in a row. Your Ledger will, as a security measure, reset after the third incorrect attempt.
- Settings menu; first you need to connect your Ledger to your computer via USB cable to turn it on. Then enter your PIN code to unlock it. Next, find the settings on the dashboard, where you select ”Security”. By pressing both buttons you will successfully reset it. To confirm, you need to enter your PIN code. Once reset, you can safely hand it over to the new owner. You can also set it up as a new device or restore it as an old device, provided of course that you have the corresponding recovery phrase.

Unwritten rules for Ledger Nano S
- Always use only the legitimate Ledger Live application. A common phishing scam is a counterfeit Ledger Live application, most notably a fake Google Chrome extension or a fake Android app. Never enter your 24-word recovery phrase into any application other than the legitimate Ledger Live. And even then, it should only be entered if the application requires it.
- Never store your 24-word recovery phrase on a computer, phone, or any device connected to the internet. The sole purpose of your Ledger hardware wallet is to keep access to your cryptocurrencies completely offline. Entering your recovery phrase into any device that can connect to the internet completely defeats the purpose of using a hardware wallet, so instead write it down on paper and store it in a hidden location.
- Never share your recovery phrase, PIN code, or Ledger Nano S with anyone, as in today’s digital world there are increasingly more crypto scammers looking to take possession of your cryptocurrencies.
Don’t miss out!
If you are interested in this content, join us at a free webinar where presenter Matija will share a wealth of useful information about cryptocurrencies and how to earn with them. You can register at the following link: https://zannekrep.com/brezplacno20/.
We are not financial advisors. All information regarding cryptocurrencies is accepted at your own risk. Do your own research as well.